QuikDaw Documentation
Some (very general) documentation for using QuikDaw
1. Setup
1.1. Program settings
When QuikDaw is freshly installed and run, it will prompt to open the initial settings dialog, to initiate some basic settings for the Audio device(s) and Project directory.
QuikDaw manages all projects within a dedicated Project directory ("QuikDawData"). The subdirectory "QuikDawData" will be added to whatever directory is selected (unless the selected directory is already "QuikDawData"). Separate folders for each new project are created inside the QuikDawData directory. Each individual project folder will be self-contained with all the audio and data files required for playing and recording for the project.
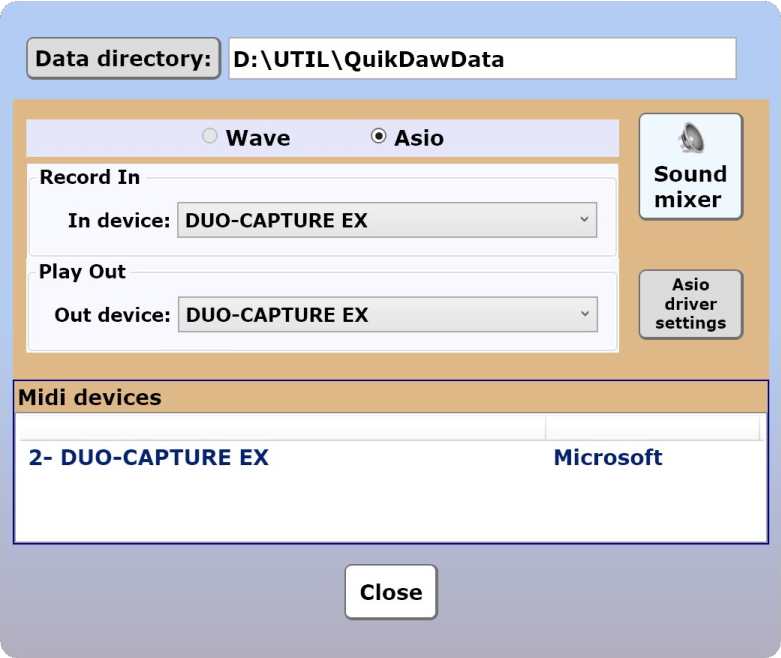
Basic setup is simple but necessary.
At the current time, only Asio devices are supported, so the "Wave" radio button is unselectable. The UI interface for the selected audio device, as well as the Windows mixer, can be accessed by the buttons at right. Available MIDI devices are not selectable but will appear in a list at the bottom.
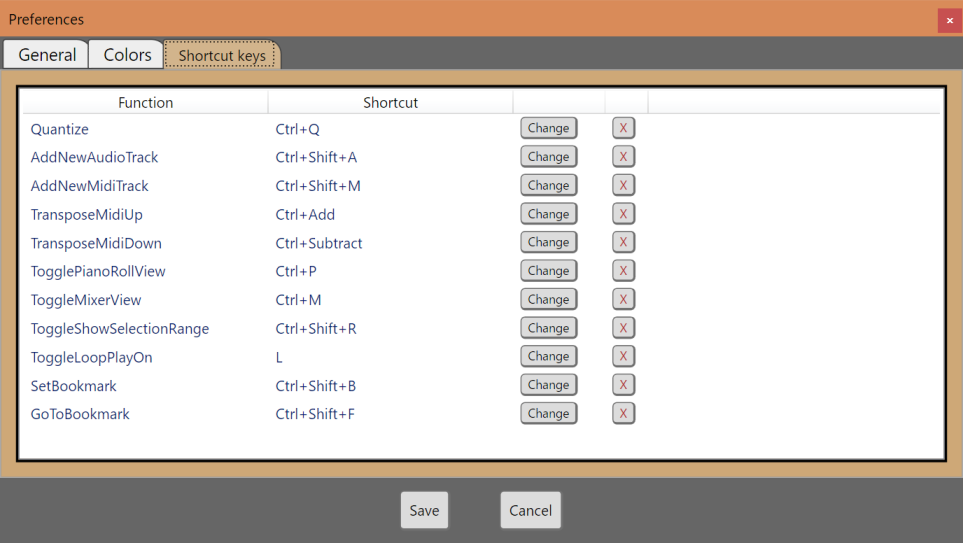
1.2. Preferences
Preferences dialog is accessed from: MainMenu, Edit, Preferences. The user preferences dialog is still barebones at the current time. Some backup preferences, default colors for track types, and shortcut keys for certain functions can be set here.
2. General usage
QuikDaw is designed to be used in a manner similar to common Digital Audio Workshops, with tracks defined as either Midi or Audio tracks, and with the ability to move and size audio and midi clips within the tracks. The number of clips/tracks that can be used is virtually unlimited but will be limited in practice by CPU clock speed, memory, latency issues, etc.
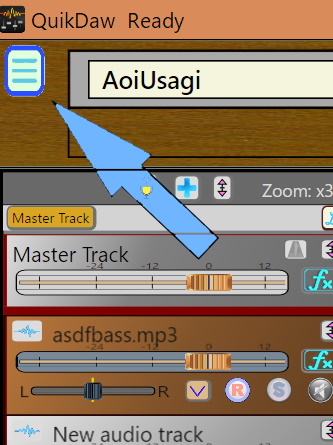
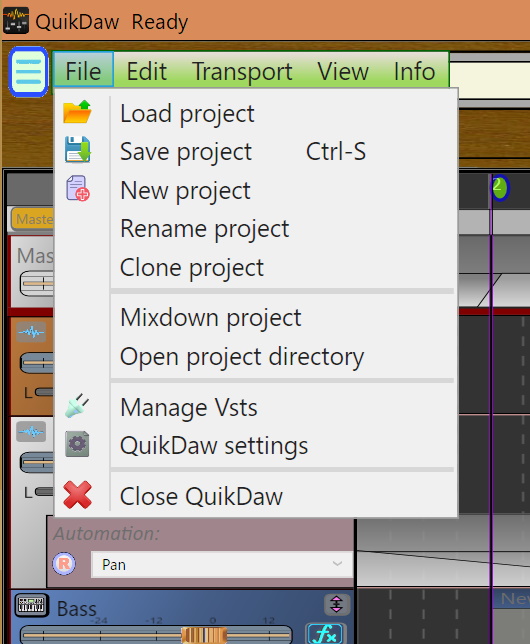
2.1 Main menu
The main menu is a popup/hide menu accessed when needed from the small green square at top left.
2.2 Loading audio files
Audio files (mp3 or wav) can be added by dragging onto the main tracks area or onto an existing track, where they will be added to the project either as a new audio track or into the existing audio track.
Audio files can also be added from a file dialog by selecting the Edit menu ("+Add audio file(s)")
In either case, a copy of the audio file is created in the project directory (...\QuikDawData\[Project name]\AudioClips\[audiofilename]).
2.3 Loading midi files
Midi files (.mid) can likewise be added either by drag/dropping, or from the Edit menu ("+Add midi file"), through a file dialog.
If the Midi file contains multiple tracks, QuikDaw will attempt to separate them into their parts on separate tracks.
2.4 Adding new tracks
New empty tracks are added by using the "+" sign at top left.
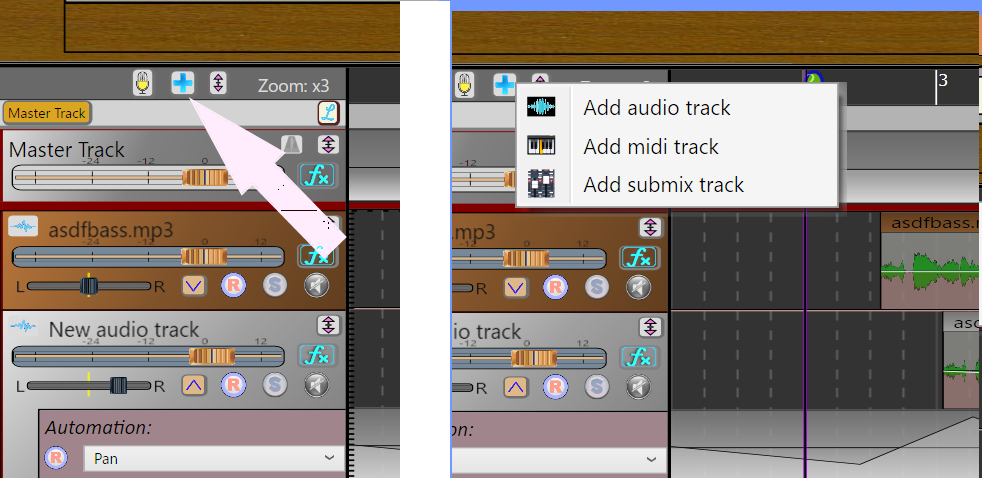
Select the type of track to be added: Audio, Midi (virtual instrument) or a new submix track.
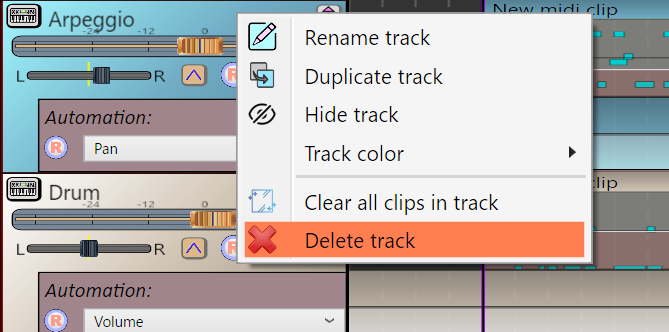
Tracks can also be added by duplication of an existing track. (Right click menu over a track control panel).
3. Tracks
3.1 Track control panel
The track control panels for Midi and Audio tracks are almost identical, the only difference being that a Midi track has a button for selection of a virtual instrument. (see "5. VST plugins" below)
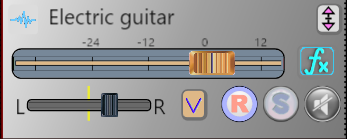

Most of the controls are self-explanatory (volume, pan, (S)olo, Mute, Fx, (R)ecord Arm).
Track Automation
The "V" button expands the automation lane for the track. (At the current time, only volume and pan can be automated, but a dream for the future is to have automation for most VST plug-in parameters as well).
Automation points are referred to as "auto points" and are created and edited in the same way as "gain points" used on clips (described below).
Automation lane expanded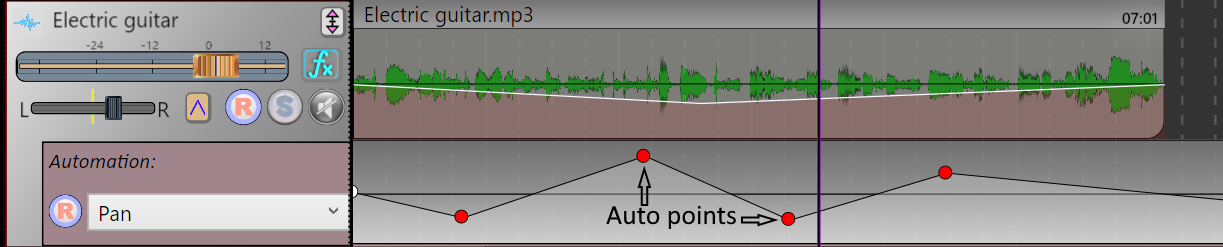
The
3.2 Track operations
3.3 Track area
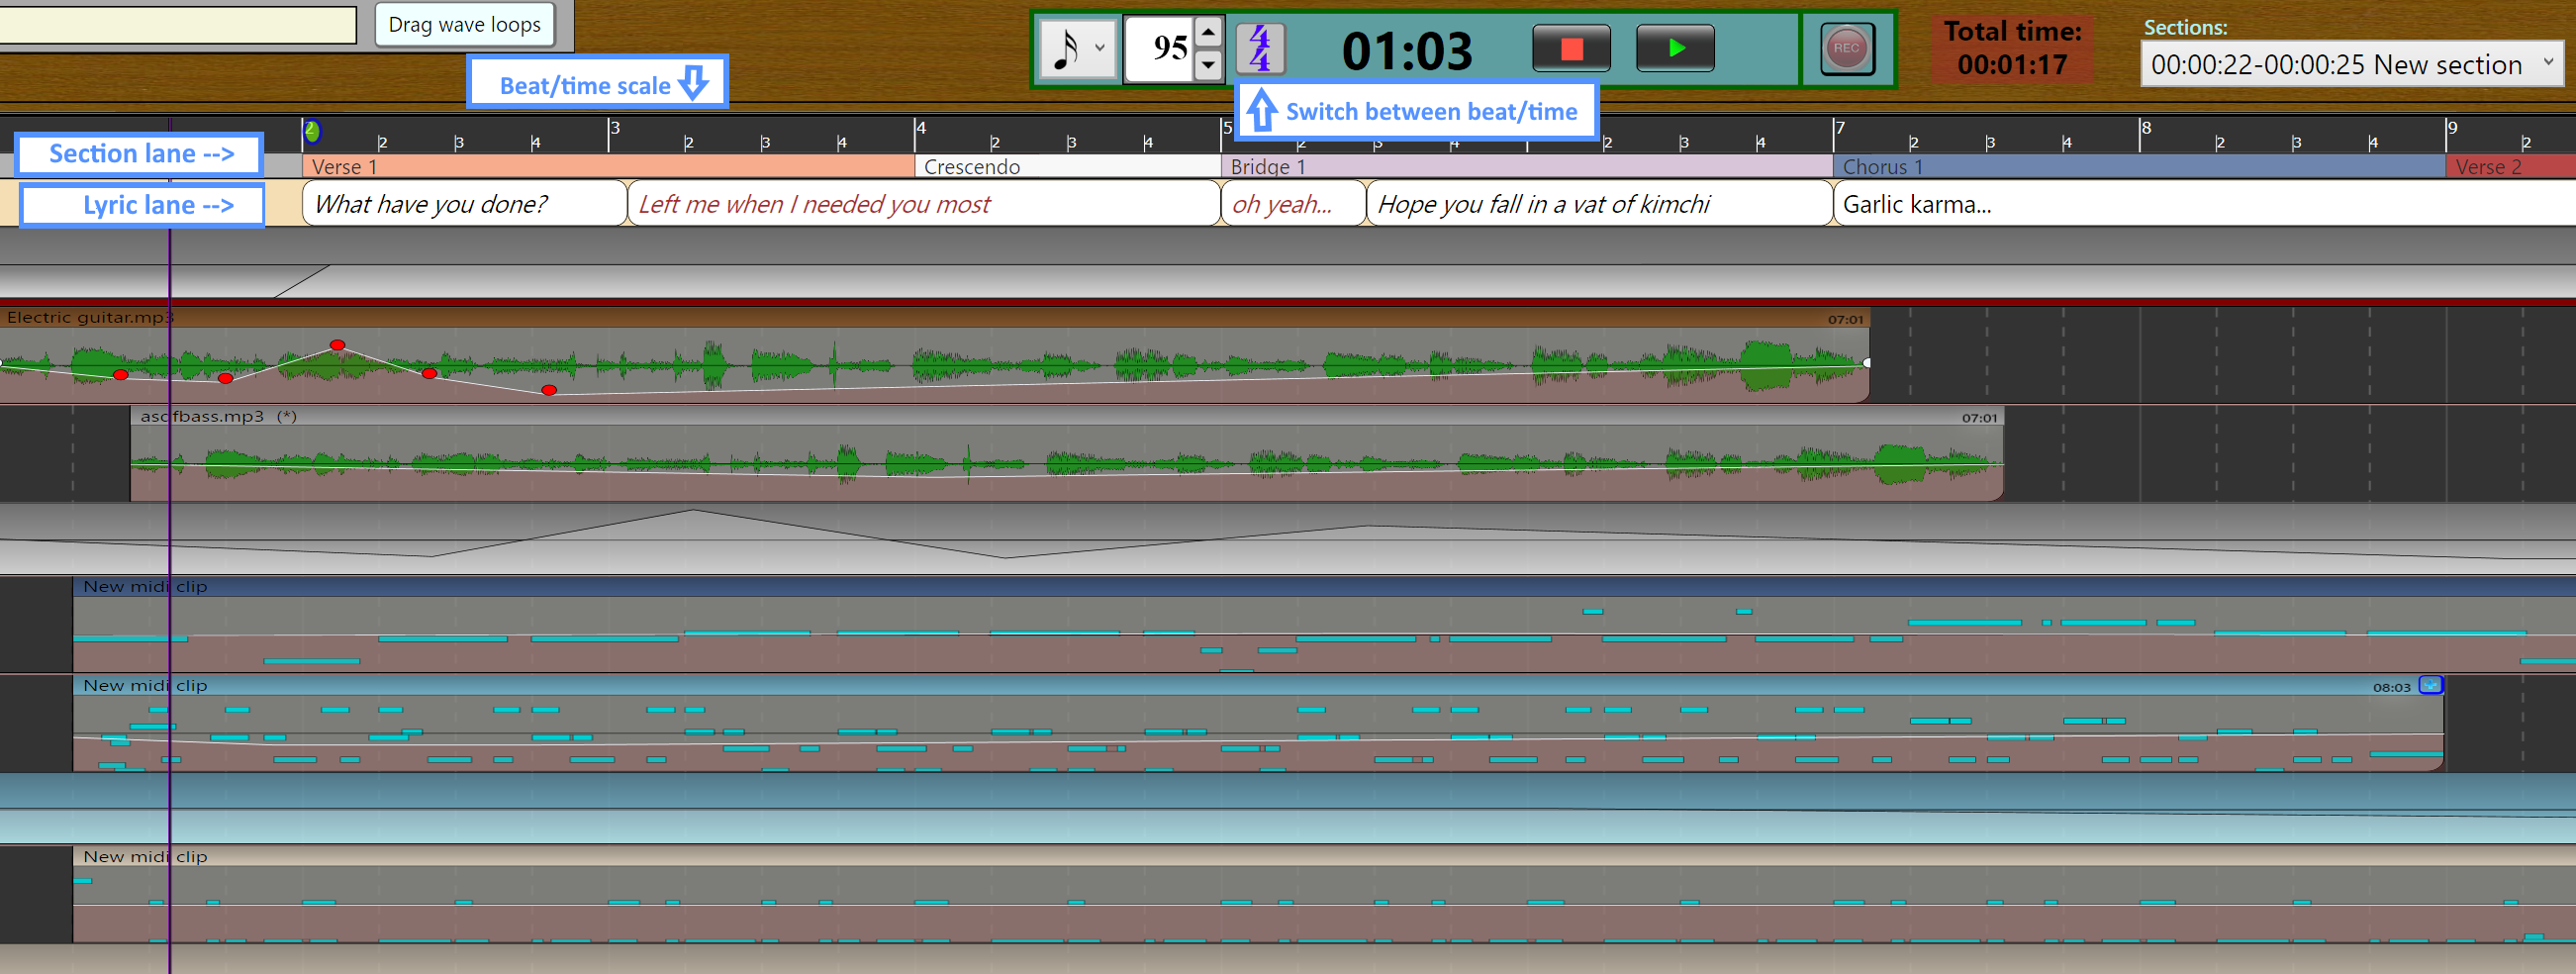
The track area contains the clips and automation lanes for each track, as well as a top scale to indicate either the measure/beat no. or time point in the project.
Also at top are:
- a Section lane where sections can be added for organization (mouse click/drag to add sections, right click to change name and color), and
- a Lyric lane for adding lyrics (right click to add lyric lines)
The section lane is always visible, while the lyric lane can be toggled show/hide by pressing the ![]() button at top left.
button at top left.
This area can be zoomed using the mouse, or scrolled using Shift-Mouse. Zooming is also possible by clicking the scale grid at top and moving the mouse upward or downward.
4. Clips
New clips can be added in several ways:
New audio clips can be added to a track either by recording a new one, by adding an existing audio file into a track, or by copying/moving an existing audio clip from another track.
Similarly, new midi clips can be added to a track either by recording a new one, by adding an existing midi file into a track, or copying/moving an existing midi clip from another track. For midi, however, a new empty midi clip can be created simply by double-clicking on an empty area of a track.
Clips have two regions, the top bar which is used to move or select the clip, and the main body of the clip which shows either the waveform (for audio clips) or midi notes (for midi clips)

Clips are moved forward or backward on the track using the mouse on the Clip top bar, and can be moved between tracks (of the same type) by holding Ctrl while moving the clip (copy) or releasing Ctrl while moving the clip (move).
Clips can also be adjusted in size (changing their start point and/or end point) by dragging the left or right edges.
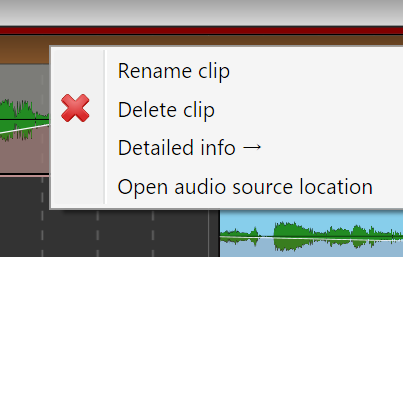
Clip functions are accessed by 2 different right-click context menus, one for the top bar, and another for the main area. Most of the menu items are self-explanatory
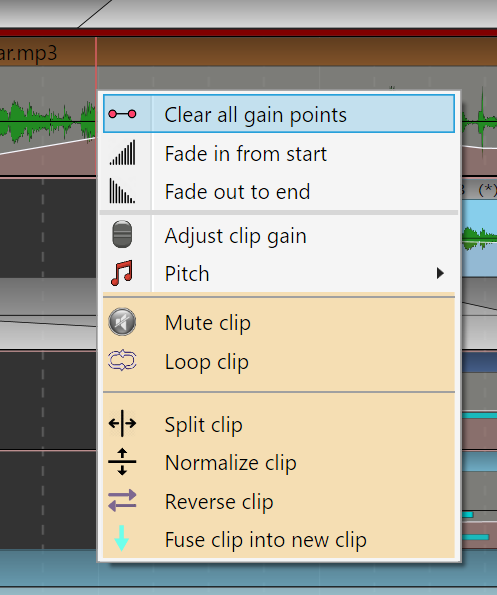
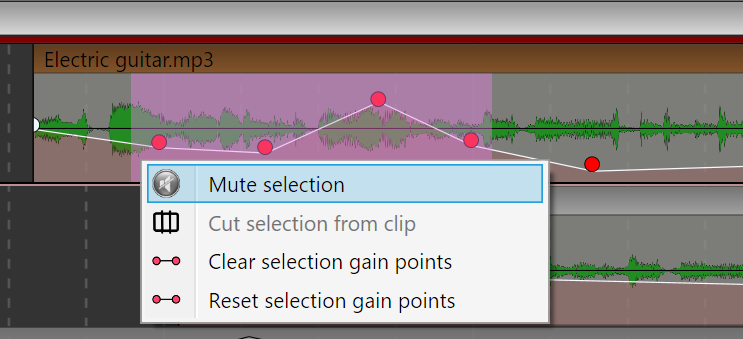
The main area of a clip contains a shaded area with "gain points", which are the volume automation for the clip. Gain points are added by clicking on the shaded area, and can be moved by mouse or deleted by right-click context menu. Selecting a region on the clip main area also allows multiple gain points to be deleted or adjusted, through a right-click context menu.
5. VST plug-ins
QuikDaw can load 64-bit, VST2 plug-ins, both effects and instruments.
The directories to be scanned must first be defined from the VST management window. (MainMenu, File, "Manage Vsts").
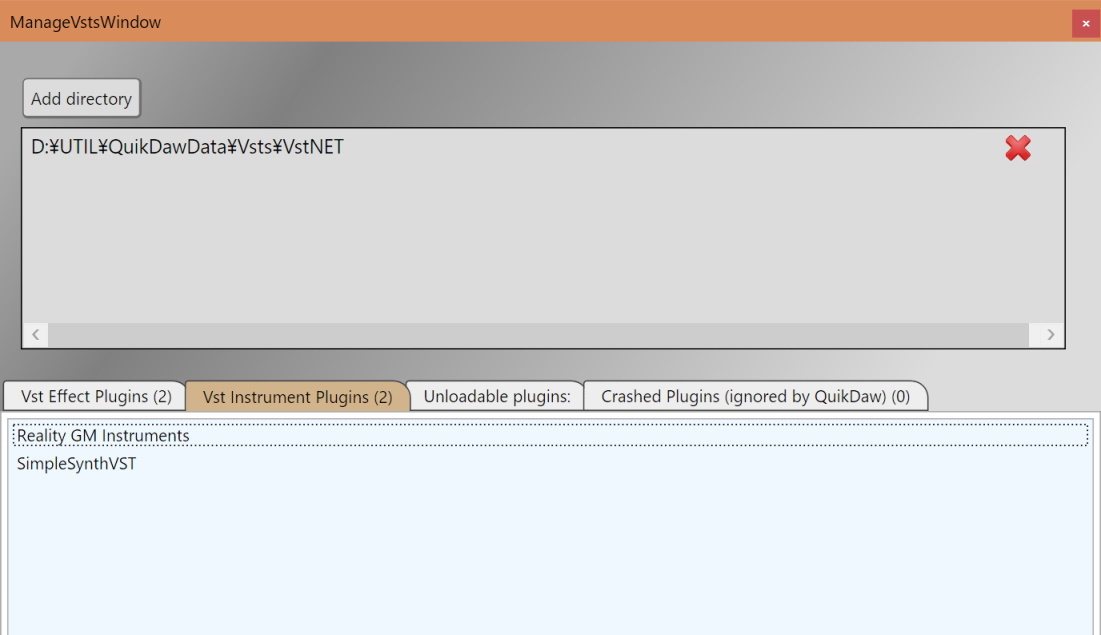
Use the "Add directory" button to add local directories to be scanned. After selection, QuikDaw must be restarted to begin scanning (in the future I plan to have a "Scan now" button to immediately scan without restarting.)
The 4 bottom tabs are:
The one VSTi that is bundled with QuikDaw is the free "Reality GM Instruments", to allow playing of General Midi sounds out of the box. (This is also the reason for the large installation file size)
6. Playing
Just hit the play button or space bar, that's about it :)
While a project is playing, some editing features are disabled (such as addition or deletion of tracks).
7. Recording
The Recording button on the Transport Bar at top becomes available once a track has been armed by pressing its
![]() button. The default recording (Asio) device will be used unless set up by:
button. The default recording (Asio) device will be used unless set up by:
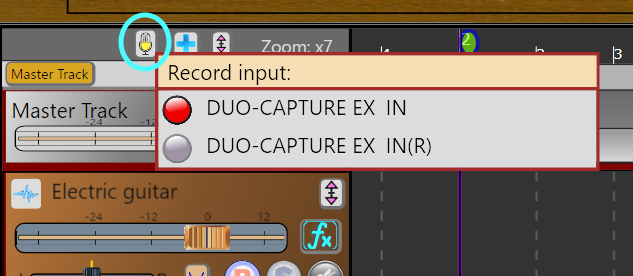
7.1 Recording setup
For now, only a global record input can be set for all tracks. The record input is changed by clicking the small microphone button at top left
Once the recording input is set, a track can be armed, and the ![]() button can be pressed to begin recording audio. During recording, all other functions are disabled until the Record button is pressed again to stop recording.
button can be pressed to begin recording audio. During recording, all other functions are disabled until the Record button is pressed again to stop recording.
8. Piano roll
The piano roll works largely similar to piano rolls in well-known commercial DAWs.
9. Mixer
There is a "Mixer" of sorts (Ctrl-M), but still very much under construction and not very useful quite yet. Better to use the horizontal track controls on the left pane...